


On this page
Geocoding is the process of converting addresses or place names into geographic coordinates—latitude and longitude—that represent a specific point on the map. These coordinates are essential for tasks like mapping, navigation, and spatial analysis.
With Python geocoding, developers use Python libraries and APIs—like the Geoapify Geocoding API—to automate this conversion and integrate location data into applications and workflows.
Why developers need geocoding for Spatial Data:
When working with spatial data, geocoding provides the critical link between descriptive location information and precise geographic coordinates that enable meaningful analysis and visualization. The process often involves interpolating locations within the geographic boundaries of a map, ensuring accurate placement on digital or printed layouts. It enables:
- Accurate mapping and visualization
- Address validation and cleanup
- Route planning and logistics
- Location-based insights for business and research
It helps connect raw address data to reliable, structured geographic information—powered by global databases and location services.
What you'll learn in this guide:
In this tutorial, you’ll learn how to convert simple addresses into structured geographic coordinates using Python and the Geoapify Geocoding API. We’ll guide you step by step—showing how to geocode single or multiple addresses, interpret the results, and write code that respects Geoapify’s API limits and rate limits.
You can also explore the full code example on GitHub.
Python Geolocation API: Converting Addresses to Lat Long
A Python geolocation API helps you turn addresses into coordinates with a simple HTTP request from your script. If you need to geocode Python address data for maps, analytics, or logistics, this approach gives you a reliable and repeatable workflow.
Use a Python geocoder workflow when you want to automate address conversion at scale, validate locations, and keep your data pipeline consistent.
Geocoding APIs make it easy to convert both free-form and structured addresses into precise geographic coordinates—latitude and longitude. Most modern APIs support international address formats, multiple languages, and use diverse datasets to improve coverage and accuracy.
These services can handle incomplete or slightly incorrect inputs by parsing, normalizing, and intelligently matching addresses. Results typically include confidence scores for different levels—such as city, street, and building—to help developers assess result quality.
Advanced features often include:
- Filtering by country or region
- Biasing results by proximity to a location
- Bounding box constraints to limit search areas
Many APIs also support batch geocoding for large-scale processing alongside standard single-address lookups.
For example, the Geoapify Geocoding API offers all of these features, making it a solid choice for developers looking to convert addresses to coordinates in Python with minimal setup.
Examples: Geocode Addresses With API
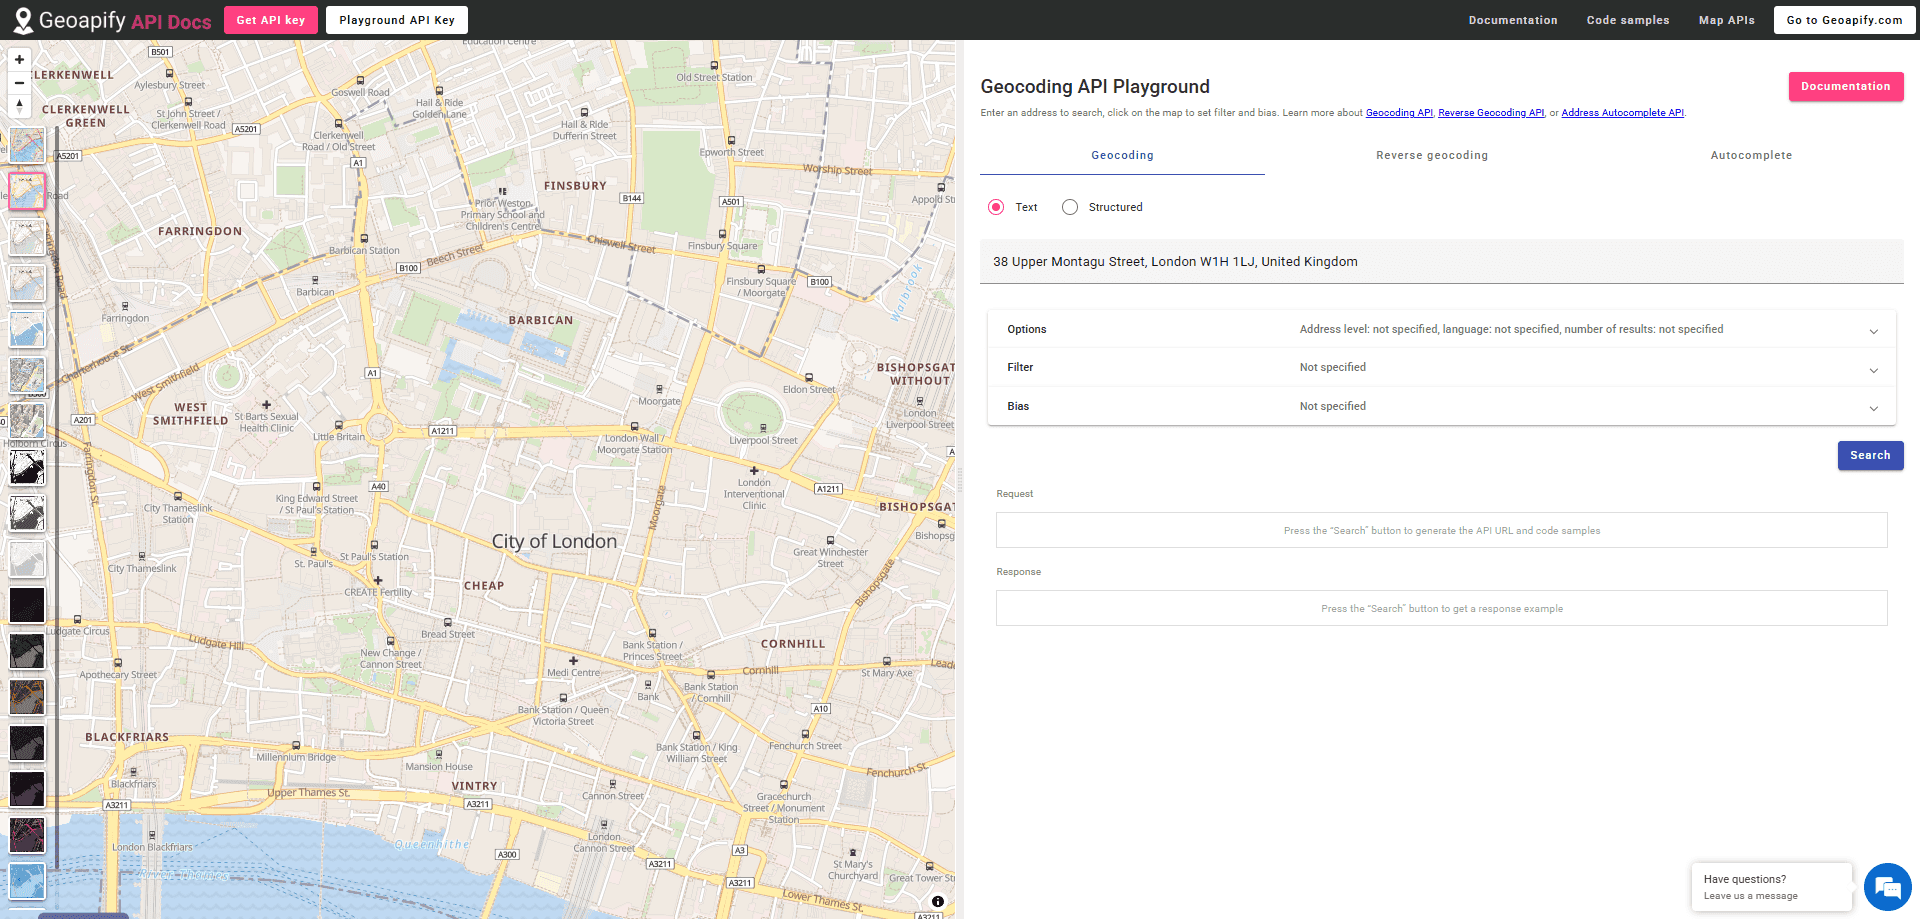
To demonstrate the functionality of the Geoapify Geocoding API, we present two examples. First, go to the Geocoding API Playground and familiarize yourself with the environment:
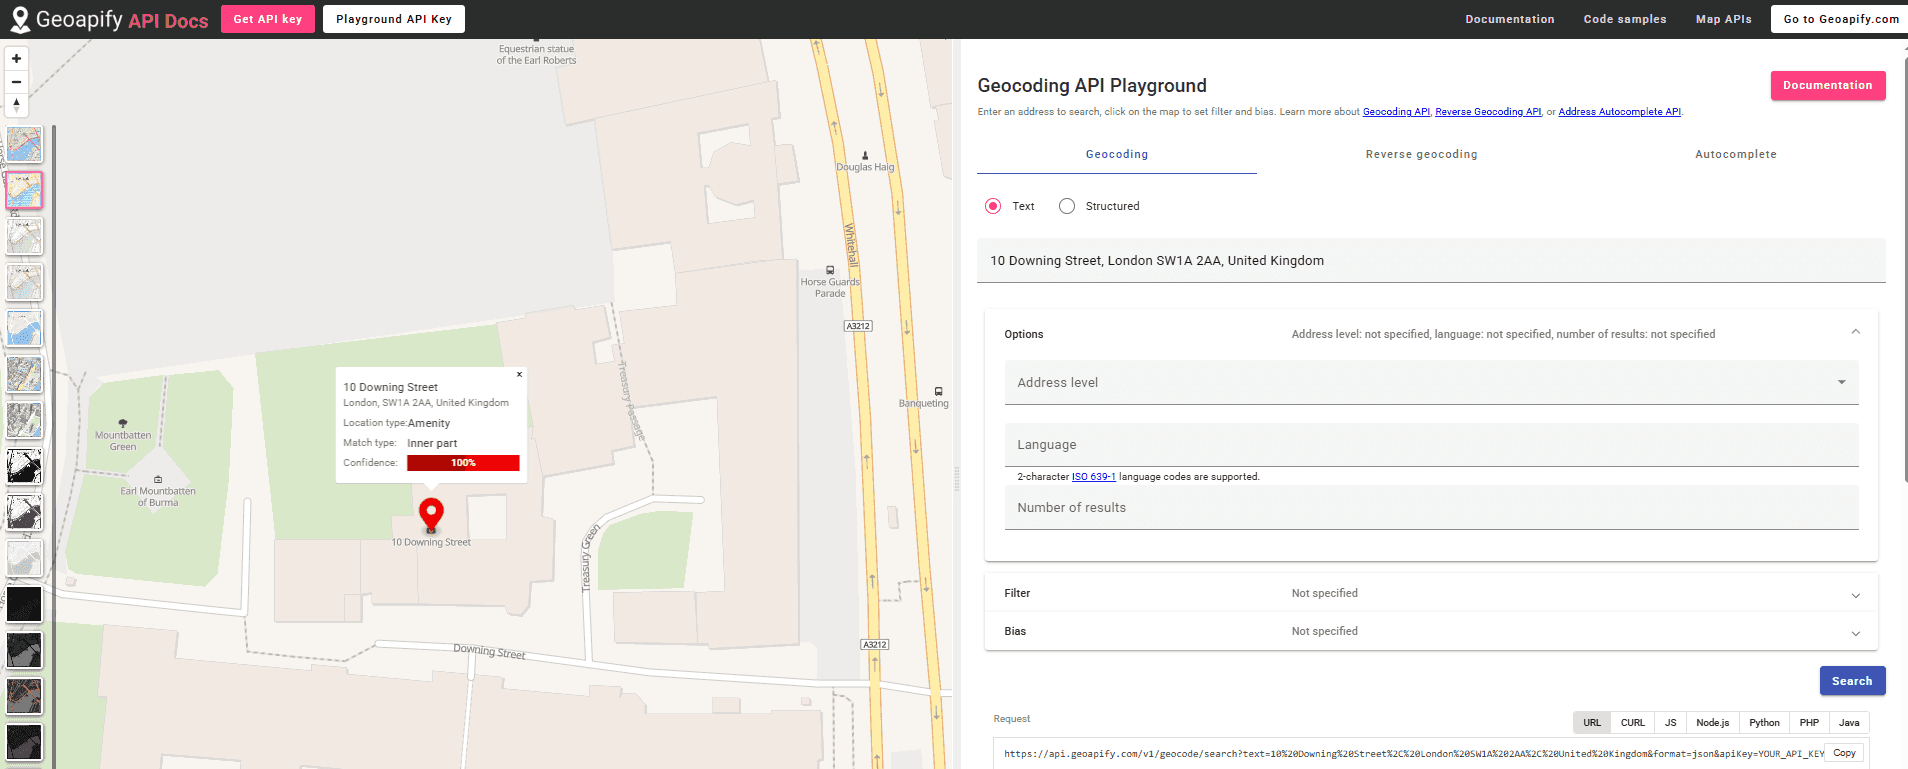
- Free-form address search
In the first example, we input the United Kingdom address "10 Downing Street, London SW1A 2AA, United Kingdom" in its textual form. The corresponding request URL is:
https://api.geoapify.com/v1/geocode/search?text=10%20Downing%20Street%2C%20London%20SW1A%202AA%2C%20United%20Kingdom&format=json&apiKey=YOUR_API_KEYUpon executing this query, the location is accurately returned, as shown in the picture below, with the specified address pinpointed on the map.
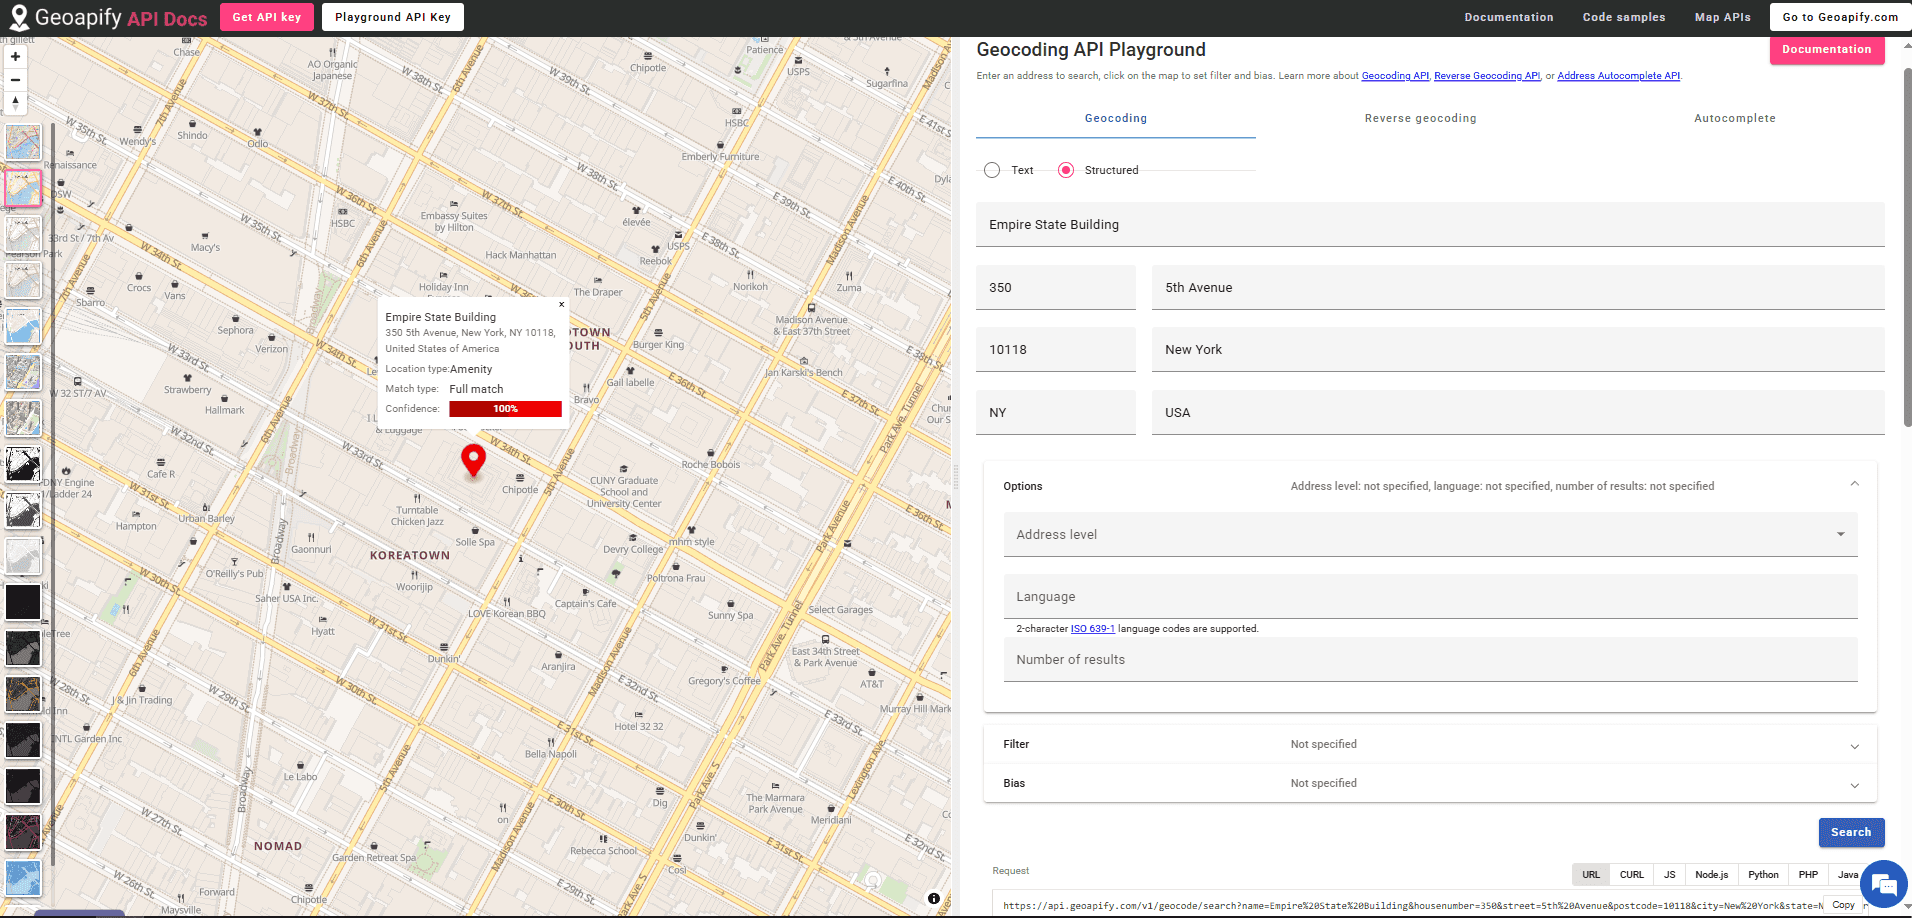
- Search by structured address
In the second example, we use a structured format to search for the New York address "350 5th Avenue, New York, NY 10118, USA". The request URL for this query is:
https://api.geoapify.com/v1/geocode/search?name=Empire%20State%20Building&housenumber=350&street=5th%20Avenue&postcode=10118&city=New%20York&state=NY&country=USA&format=json&apiKey=YOUR_API_KEYThis query returns the precise location on the map, as demonstrated in the picture:
These examples highlight the API's ability to process both free-form and structured address inputs, providing accurate geolocation data for various use cases. You can explore the full range of input parameters and response formats in the Geoapify Geocoding API documentation. In the API Playground, you can also test queries, view the generated request URL, and inspect the full response object interactively.
Handling API Limits for Reliable Geocoding
Respecting API limits is essential for building stable, scalable applications. Exceeding limits can lead to errors, blocked requests, and degraded performance—especially during high-volume tasks like batch geocoding. Managing limits helps maintain smooth, uninterrupted workflows when converting addresses to latitude and longitude in Python.
Types of API Limits
Most APIs enforce two types of limits:
- Daily quota – Total number of requests allowed per day (e.g., 3,000 requests/day on Geoapify’s free plan)
- Rate limit – Number of requests allowed per second (e.g., 5 requests/second)
Exceeding either can cause errors (like HTTP 429) or temporary blocks. These safeguards ensure fair use and stable service for all users.
Challenges and Best Practices
Handling API limits goes beyond simply sending requests and receiving results. In real-world use, especially with geocoding, your Python code must be built to respect rate limits and quotas.
For example, if a developer writes a Python script that sends 1,000 geocoding requests in a tight loop without delays, most of those will return HTTP 429 errors (“Too Many Requests”) because they exceed the allowed requests per second (RPS). On Geoapify’s free plan, the limit is 5 requests per second.
To avoid this, geocoding code should:
- Throttle requests using
time.sleep() - Retry failed requests with delay and backoff
- Split batches into smaller groups over time
Our code sample below demonstrates how to send geocoding requests in Python while staying within the allowed RPS—ensuring reliable results without triggering errors.
Time for practice: Converting Address to Lat Long in Python
Let’s say you have a list of addresses and need to convert them into geographic coordinates using Python. While this might seem straightforward at first, geocoding multiple addresses efficiently—and reliably—can be tricky without the right tools.
Fortunately, Python, combined with the Geoapify Geocoding API, makes it easy to automate this process. In the next steps, we’ll walk you through setting up your environment so you can get started smoothly.
Setting Up a Python Geocoding Environment
First, make sure Python 3.12+ and pip are installed on your machine. Then, create a dedicated folder for your project and set up a virtual environment to manage dependencies:
cd C:\path\to\tutorial_1
python -m venv geocoding-env
.\geocoding-env\Scripts\Activate  # On Windows

# On macOS/Linux use:
# source geocoding-env/bin/activate
Installing Required Python Libraries
Once your environment is activated, install the requests library. This is what Python will use to communicate with the Geoapify Geocoding API:
pip install requestsPrepare a list of addresses
Prepare a list of addresses implementing the geocoding functionality. You can save them as an array or read from a txt file.
Here is an example of a txt file:
The Metropolitan Museum of Art, 1000 5th Ave, New York, NY 10028, USA
American Museum of Natural History, Central Park West & 79th St, New York, NY 10024, USA
The Museum of Modern Art, 11 W 53rd St, New York, NY 10019, USA
Whitney Museum of American Art, 99 Gansevoort St, New York, NY 10014, USA
Solomon R. Guggenheim Museum, 1071 5th Ave, New York, NY 10128, USA
Brooklyn Museum, 200 Eastern Pkwy, Brooklyn, NY 11238, USA
You can read them this way:
with open(input_file, 'r') as f:
    addresses = f.read().strip().splitlines()
Getting Your Geoapify API Key
To use Geoapify’s geocoding service, you’ll need a free API key. Follow these steps:
- Go to www.geoapify.com
- Sign up for a free account
- Create a new project
- Copy your personal API key
You’ll include this key in your Python script to authenticate your requests.
Sending Geocoding Requests with geocode_address()
The geocode_address() function handles sending a single request to the Geoapify Geocoding API and returns structured location data for the given address. It also includes error handling and optional filtering by country.
Here’s how the function works:
def geocode_address(address, api_key, country_code):
    params = {
        'format': 'json',        # Request JSON response
        'text': address,         # Address to be geocoded
        'limit': 1,              # Return only the top result
        'apiKey': api_key        # Geoapify API key
    }
    if country_code:
        params['filter'] = 'countrycode:' + country_code  # Optional country filter

    try:
        response = requests.get(GEOAPIFY_API_URL, params=params)
        if response.status_code == 200:
            data = response.json()
            if len(data['results']) > 0:
                return data['results'][0]  # Return first result if found
            else:
                return { "error": "Not found" }  # No results returned
        else:
            logger.warning(f"Failed to geocode address '{address}': {response.text}")
            return {}
    except Exception as e:
        logger.error(f"Error while geocoding address '{address}': {e}")
        return {}
What it does:
- Prepares the query parameters, including an optional country restriction.
- Sends a GET request to the Geoapify API using
requests. - Parses the response JSON and returns the top match.
- Returns a fallback response if the result is not found or if the request fails.
- Uses
loggerto output warnings and errors for better visibility.
This function is designed for use in both real-time applications and batch workflows, providing a safe and consistent way to geocode addresses in Python.
Splitting Address List into Batches to Respect Rate Limits
To avoid exceeding the requests per second (RPS) limit when using the Geoapify Geocoding API, we split the address list into batches. Each batch contains a number of addresses equal to the allowed RPS (e.g., 5), and we wait one second between sending each batch. This ensures our script respects Geoapify’s rate limits and avoids 429 Too Many Requests errors.
We achieve this by using Python’s itertools.batched() to split the address list:
from itertools import batched

REQUESTS_PER_SECOND = 5
addresses = list(batched(addresses, REQUESTS_PER_SECOND))
Next, we use Python’s ThreadPoolExecutor to send requests concurrently within each batch. After sending a batch, we wait for 1 second using sleep() before continuing with the next batch.
from concurrent.futures import ThreadPoolExecutor, wait, ALL_COMPLETED
from time import sleep

tasks = []
with ThreadPoolExecutor(max_workers=10) as executor:
    for batch in addresses:
        tasks.extend([
            executor.submit(geocode_address, address, api_key, country_code)
            for address in batch
        ])
        sleep(1)  # Pause to respect 1 batch per second
Finally, we wait for all tasks to complete and collect the results:
wait(tasks, return_when=ALL_COMPLETED)
results = [task.result() for task in tasks]
This approach ensures that your Python geocoding script remains fast, parallel, and API-compliant, even when processing large datasets.
GitHub Example: Geocode Addresses with Python and the Geoapify API
For a ready-to-use solution based on this tutorial, you can find the full script on GitHub, along with sample data, installation instructions, and usage examples:
To get started:
- Clone the repository
- Create and activate a virtual environment
- Install dependencies using
pip - Add your personal API key
- Run the script with the included sample input file
The repository's README provides step-by-step guidance on setup and usage, making it easy to get up and running quickly.
Batch Geocoding with Python and the Geoapify API
After learning how to geocode individual addresses in Python, it's time to scale up. Batch geocoding allows you to convert large lists of addresses into geographic coordinates in a single operation—ideal for processing datasets where speed, cost-efficiency, and automation are essential.
Geoapify’s Batch Geocoding API supports up to 1000 addresses per request and is designed for scalable geospatial applications.
Key features of Geoapify's batch geocoding:
- Asynchronous processing: Submit a POST request, receive a job ID and result URL, then fetch results once ready
- Cost-effective: Uses only 0.5 credits per address (vs. 1 credit in single address geocoding)
- Flexible output: Supports both JSON and CSV formats
- Smart configuration: Includes support for filtering, proximity biasing, and localization
This approach is perfect for developers building batch geocoding pipelines or location-based applications in Python.
For more details, see the Batch Geocoding documentation.
Learn how to implement it in our Batch Geocoding in Python tutorial.
Looking to convert coordinates back into addresses? Learn how to perform reverse geocoding with our step-by-step Reverse Geocoding in Python tutorial.
Conclusion
Geoapify provides a flexible and developer-friendly platform for handling geocoding tasks of all sizes—whether you're working with a few addresses or processing thousands.
- Use real-time geocoding for interactive applications and on-demand lookups.
- Choose batch geocoding for high-volume workflows that require cost-efficient and asynchronous processing.
Each approach has its own strengths in terms of speed, complexity, and API usage. Fortunately, Geoapify supports both methods seamlessly, allowing you to build solutions that scale with your needs.
We encourage you to explore the full Geoapify platform—beyond geocoding. Tools like map rendering, routing, place search, and spatial analysis open up even more possibilities for powerful, location-based applications.
Ready to get started? Sign up for a free Geoapify API key and start geocoding today!
FAQ
What is geocoding?
Geocoding is the process of converting a human-readable address or place name into geographic coordinates (latitude and longitude). These coordinates can then be used for mapping, spatial analysis, routing, or location-based services.
What’s the difference between single and batch geocoding?
Single geocoding converts one address at a time and returns results immediately. Batch geocoding processes up to 1000 addresses in one asynchronous request, making it more efficient and cost-effective for large datasets.
How many requests can I make with the Geoapify Free plan?
The Free plan allows up to 3,000 requests per day and 5 requests per second. Batch geocoding only uses 0.5 credits per address, so you can process up to 6,000 addresses daily using the batch endpoint.
What happens if I exceed the rate or quota limits?
If you exceed the rate limit (e.g., more than 5 requests per second), the API will return a 429 Too Many Requests error. To avoid this, implement throttling and retry logic. Read more in our guide on avoiding 429 errors.
Can I geocode addresses from a CSV file?
Yes. You can load addresses from a CSV or TXT file in Python and pass them to the Geoapify API. See the full working example on GitHub.
Do I need an API key to use the Geoapify Geocoding API?
Yes. You can get a free API key by signing up at www.geoapify.com. The key is required to authenticate each request.
Is there a free geocoding API for Python?
Yes. Geoapify offers a free plan you can use as a free geocoding API for Python projects. You can start with the free quota, then scale to paid plans when your request volume grows. See current limits and quotas on the pricing page.
Where can I find the full working example?
You can find it on GitHub with complete setup instructions and sample data.