


Visualize multiple locations on a map with beautiful and interactive pins. It's very simple with Mapifator Map Story! In this article, we tell you how to create a map with pins and multiple locations with ease and no coding only in 5 Steps.
Process of Creating a Map With Pins
You need to register in Mapifator and create a new online map. You may have a question if it's free or not. So the answer is "Yes! It's free for small map stories! Even for commercial use!" We have a freemium model, so start making a map with pins for free and extend it when you need it.
Step 1. Prepare places data
Mapifator Map Story allows creating maps and visualizing places on it. Place in Mapifator is not only a location but also interesting and useful information, attached media and even actions. To make a map quick and easy we recommend to prepare some data before you start.
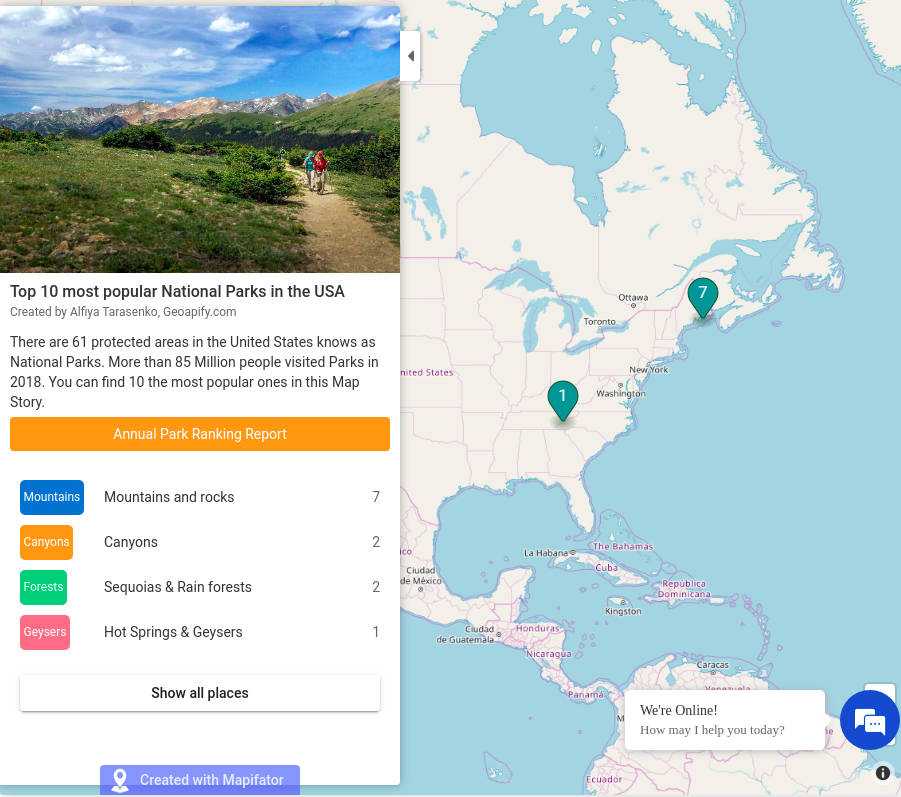
Here is an example of data we prepared for the "Top 10 most popular National Parks in the USA" map story:
| Name | Location | Description | Youtube videos | External links |
|---|---|---|---|---|
| Great Smoky Mountains | Great Smoky Mountains National Park, United States of America | Recreation Visits in 2018: 11,421,200 As a part of the Appalachian Mountains, Great Smoky Mountains contain more than 850 miles (1,370 km) of hiking trails... | https://youtu.be/poyWuEA6HT0 | https://www.nps.gov/grsm/index.htm |
| Grand Canyon | Grand Canyon, United States of America | Recreation Visits in 2018: 6,380,495 Grand Canyon is a steep-sided canyon carved by the Colorado River... | https://youtu.be/dGGWu_noS3w | https://www.nps.gov/grca/index.htm |
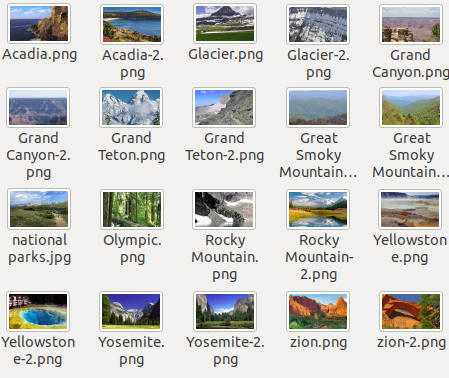
If you plan to add some pictures to the map, it's better to prepare them as well. A place in the Mapifator can have a few images attached. We recommend adapting picture sizes to the web and having pictures with the same aspect ratio. We use 450px width pictures for our map stories.
Moreover, Mapifator allows adding some general information and pictures (logos) about the map, prepare it as well. You can prepare this data as well. For example like that:
| Name | Description | Links |
|---|---|---|
| Top 10 most popular National Parks in the USA | There are 61 protected areas in the United States knows as National Parks. More than 85 Million people visited Parks in 2018. You can find 10 the most popular ones in this Map Story | https://en.wikipedia.org/wiki/List_of_national_parks_of_the_United_States |
Step 2. Create markers and tags
With Mapifator you can create very beautiful markers for your places. You can use default one or create a set of markers for the places you want to visualize.
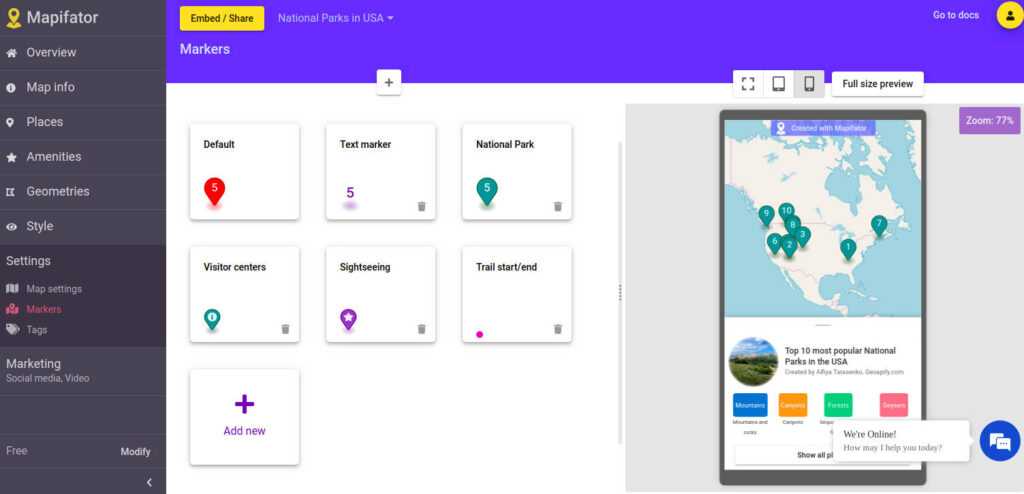
To add new Markers and Tags go to the "Settings" menu. You can always change the design of your markers and tags later, so all pins on a map will be automatically redrawn.
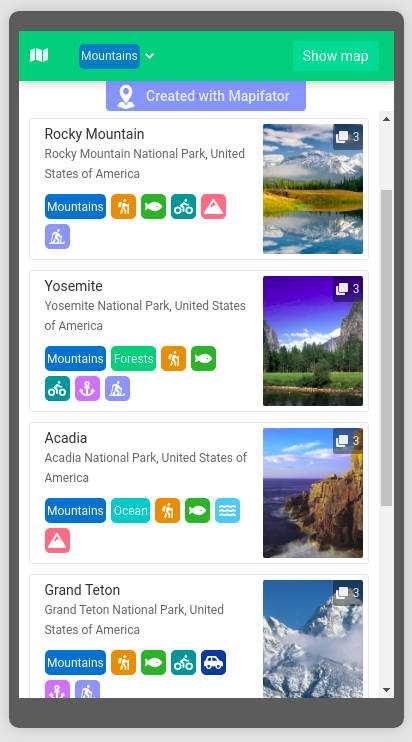
Mapifator tags help you to provide information about a place in a compact and informative form. For example, you can add tags like "Fishing", "Walking", "Swimming" and show their icons when providing the place description. In addition, tags are used as filters on a map. So your customers could have quick access to places with the tag feature.
With Mapifator you can add text and icons to tags and specify a color.
Furthermore, some tags could be added to the map description and appear as the main place filters for your map.
If you plan to use free icons, read our guide on free map icon sets.
Visit our Marker Icon API Playground and try to design your own marker icons.
Step 3. Add places and map information to the map
When the main job is done, it takes only a few moments to generate a map with pins and integrate it into your website or application: Add places data in the "Places" menu. You can specify also an order of the places there.
In the Place Editor, you can add prepared data and media, specify tags for each place.
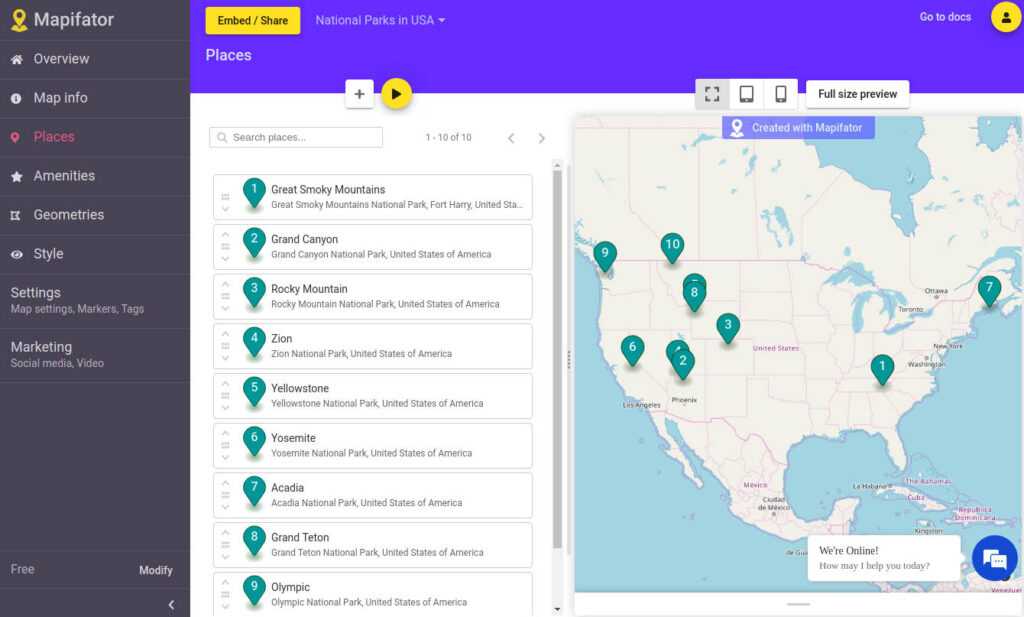
Similarly, add map information and define tag filters.
In addition, you can add information about the map owner and an external link as the main action for the map. This could be, for example, a link to your website or another resource.
If you use some media that requires attribution, in Mapifator you can add all required labels and links to make your map compatible with the license conditions.
Step 4. Define a design for your map
Mapifator allows you to choose between several layouts for your map story.
Define a design for the Map Story by selecting one for the Map Information, List Item and Place view.
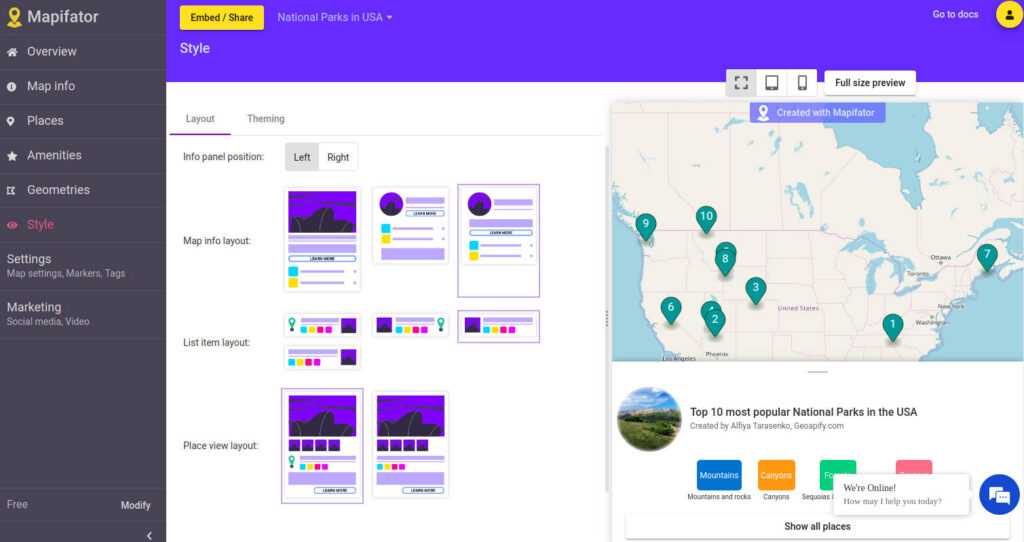
In addition, you can choose colors for your map story, that fill the best to your website or application design.
Note! Mapifator maps are already prepared for the mobile view, so the chosen layouts could look different on small devices. With the help of preview buttons, you can check how the map adjusts to different screen sizes.
Step 5. Share or embed your Map Story
Congratulations! Your online map is ready for your customers!

Just click the "Share / Embed" button to get the share link or embed code.
Mapifator provides Map Stories as maps and articles. Choose the view you like the most!


