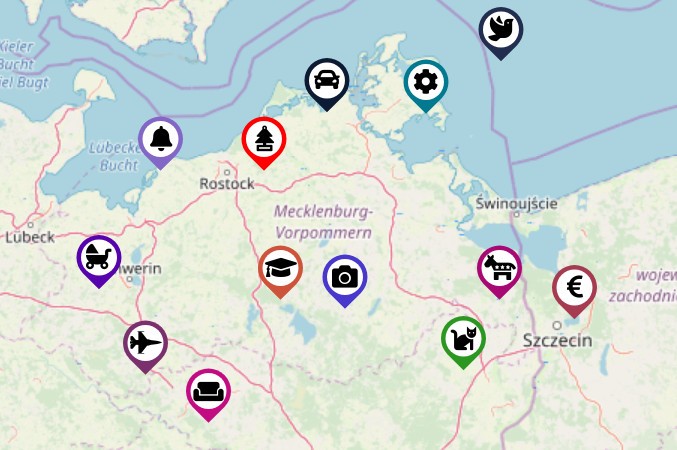
In our previous article, we mentioned two icon sets you can use for free as a map marker icon. In this article, we would like to show you how to create amazing and easy to style map marker pins with Material Design or Awesome icons only with HTML and CSS and add them to your map with Leaflet library.
Almost all mapping libraries allow you to customize marker icons. For example, you can set a ready-to-use image or add an HTML object as a marker icon.
You can generate a Marker Icon with our new Marker Icon API or create it step by step by yourself by following the instructions below.
Create a Leaflet marker with DivIcon
The Leaflet library has a possibility to set up a map marker icon, its size, a position as well as marker shadow icon. Moreover, the extended class from map icon DivIcon allows specifying the div element as a marker icon.
We will focus on DivIcon element and show you how to create beautiful marker icons only with HTML and CSS.
There are a few things you need to know before you start to create a custom marker with DivIcon. Firstly, by default, the Top-Left corner of the icon is bound to the location. To make the pin point to the location you need to specify iconSize and iconAnchor when creating an icon. For example:
var icon = L.divIcon({
        ...
        iconSize: [30, 42],
        iconAnchor: [15, 42] // half of width + height
    });
Secondly, if you rotate a pin element in CSS, keep in mind that the result icon size may be different than pin element size. In our example, we rotate the element to 45 degrees, the height of the result element is 30px ***** √2 = 42px
Create a marker icon with Material Design icon
You can create a map marker with Material Design icons that way:
icon = L.divIcon({
        className: 'custom-div-icon',
        html: "<div style='background-color:#c30b82;' class='marker-pin'></div><i class='material-icons'>weekend</i>",
        iconSize: [30, 42],
        iconAnchor: [15, 42]
    });

L.marker([53, 12], { icon: icon }).addTo(map);
.marker-pin {
width: 30px;
height: 30px;
border-radius: 50% 50% 50% 0;
background: #c30b82;
position: absolute;
transform: rotate(-45deg);
left: 50%;
top: 50%;
margin: -15px 0 0 -15px;
}
// to draw white circle
.marker-pin::after {
content: '';
width: 24px;
height: 24px;
margin: 3px 0 0 3px;
background: #fff;
position: absolute;
border-radius: 50%;
}
// to align icon
.custom-div-icon i {
position: absolute;
width: 22px;
font-size: 22px;
left: 0;
right: 0;
margin: 10px auto;
text-align: center;
}Create a marker icon with Awesome Font
Almost the same way you create map marker icons from Awesome Font. But with one difference - you need to adjust the icon size. For example:
icon = L.divIcon({
	className: 'custom-div-icon',
        html: "<div style='background-color:#4838cc;' class='marker-pin'></div><i class='fa fa-camera awesome'>",
        iconSize: [30, 42],
        iconAnchor: [15, 42]
    });
.custom-div-icon i.awesome {
margin: 12px auto;
font-size: 17px;
}Find the working example of the code here - https://jsfiddle.net/a08oek3w/2/
Geoapify offers maps and API to make your map interactive. Register and try for free our APIs.
