


Adding a map to a WordPress website is a great way to engage visitors and give them a visual way to explore your content. There are a number of plugins and services that offer map functionality, but in this tutorial, we'll be using Geoapify Location Platform to add a map with an address autocomplete field to a WordPress website.
What you'll need
In order to follow along with this tutorial, you will need a WordPress website as well as a Geoapify account. If you do not have a WordPress website, you can create one for free at WordPress.com.
To create a Geoapify account, visit the "Get started with Maps API" page. After creating an account, you will have to create a project. Once you have created your project, you can access your API key from the dashboard.
Adding a map to your website
Now that we have our API key, we can start adding the Leaflet map to our WordPress website. To do this, follow the steps below.
Step 1: Create a new page on your WordPress site. Inside that page, add a "Custom HTML" block with the following content:
<script type="text/javascript" src="https://cdnjs.cloudflare.com/ajax/libs/leaflet/1.7.1/leaflet.js"></script>
<link rel="stylesheet" type="text/css" href="https://cdnjs.cloudflare.com/ajax/libs/leaflet/1.7.1/leaflet.css">
This will include the necessary Javascript and CSS files to create your Leaflet map. You can optionally save JS and CSS files to your website as files and refer to them.
Step 2: After that, add a new "Custom HTML" block and add two div elements inside this to display your map.
<div class="map-container">
  <div id="map" style="height:400px"></div>
</div>
Step 3: Finally, add another "Custom HTML" block. Inside this block, we are going to add the main code to display our map. Be sure to replace the value of "YOUR_API_KEY" with the API key you received from your Geoapify dashboard.
<script>
  // Get your own API Key on https://myprojects.geoapify.com
  const myapiKey = "YOUR_API_KEY";

  // The Leaflet map Object
  const map = L.map('map', {zoomControl: false}).setView([38.908838755401035, -77.02346458179596], 12);

  // Retina displays require different mat tiles quality
  const isRetina = L.Browser.retina;

  const baseUrl = "https://maps.geoapify.com/v1/tile/osm-bright/{z}/{x}/{y}.png?apiKey=YOUR_API_KEY";
  const retinaUrl = "https://maps.geoapify.com/v1/tile/osm-bright/{z}/{x}/{y}@2x.png?apiKey=YOUR_API_KEY";

  // Add map tiles layer. Set 20 as the maximal zoom and provide map data attribution.
  L.tileLayer(isRetina ? retinaUrl : baseUrl, {
    attribution: 'Powered by <a href="https://www.geoapify.com/" target="_blank">Geoapify</a> | <a href="https://openmaptiles.org/" rel="nofollow" target="_blank">(c) OpenMapTiles</a> <a href="https://www.openstreetmap.org/copyright" rel="nofollow" target="_blank">(c) OpenStreetMap</a> contributors',
    apiKey: myapiKey,
    maxZoom: 20,
    id: 'osm-bright'
  }).addTo(map);

  // add a zoom control to bottom-right corner
  L.control.zoom({
    position: 'bottomright'
  }).addTo(map);
</script>
You can personalize your map by choosing from different styles and colors. More map styles are available here >>
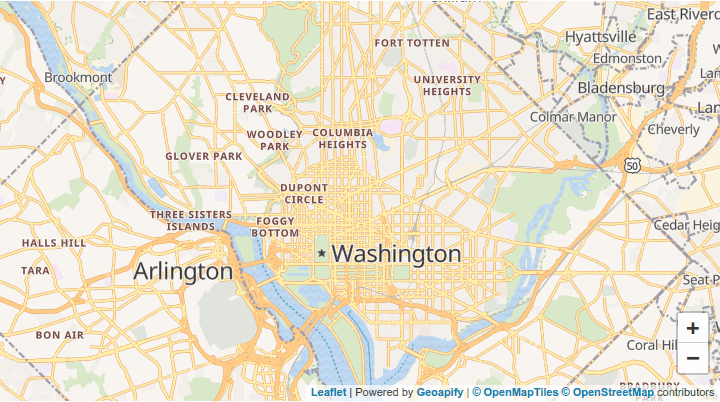
Step 4: Publish and Preview the page. You should see a Leaflet map in your page:
Adding an Autocomplete Field
Now that we have our map, we can add an autocomplete field so that visitors can search for an address and have it automatically populate the map.
Step 1: The first thing we need to do is include the necessary Javascript files. Add the following code to the "Custom HTML" block you created in the Step 1 of the previous section.
<script type="text/javascript" src="https://unpkg.com/@geoapify/geocoder-autocomplete@^1/dist/index.min.js"></script>
<link rel="stylesheet" type="text/css" href="https://unpkg.com/@geoapify/geocoder-autocomplete@^1/styles/minimal.css">
Step 2: Next, we need to add the div element that will contain our autocomplete field. Add the following code to the "Custom HTML" block you created in Step 2 of the previous section.
<div class="map-container">
  <div class="autocomplete-panel">
    <div id="autocomplete" class="autocomplete-container"></div>
  </div>
  <div id="map" style="height:400px"></div>
</div>
Step 3: Finally, we need to add the code that will create our autocomplete field. Create a new "Custom HTML" block and add the below content. Be sure to replace the value of "YOUR_API_KEY" with the API key you received from your Geoapify dashboard.
<script>
  // check the available autocomplete options on the https://www.npmjs.com/package/@geoapify/geocoder-autocomplete
  const autocompleteInput = new autocomplete.GeocoderAutocomplete(
                        document.getElementById("autocomplete"),
                        myapiKey,
                        { /* Geocoder options */ });

  autocompleteInput.on('select', (location) => {
    map.panTo([location.properties.lat, location.properties.lon]);
  });
</script>
The Geocoder constructor function takes a number of options as parameters, which are described below.
- type: The type of location, which can be one of five options: country, state, city, postcode, street, amenity.
- lang: The language of the results.
- number: The maximum number of suggestions to return.
- placeholder: The placeholder text for the input field.
- debounceDelay: The delay (in milliseconds) between user input and API calls, to prevent unnecessary calls. The default value is 100ms.
- skipIcons: A setting to determine whether or not to add icons to suggestions.
- skipDetails: A setting to determine whether or not to skip place details API calls on selection changes.
- filter: A filter to apply to places, by country, boundary, or circle.
- bias: A preference for places by country, boundary, circle, or location.
Step 4: Publish and Preview the page. You should see an autocomplete field on the top of your map.
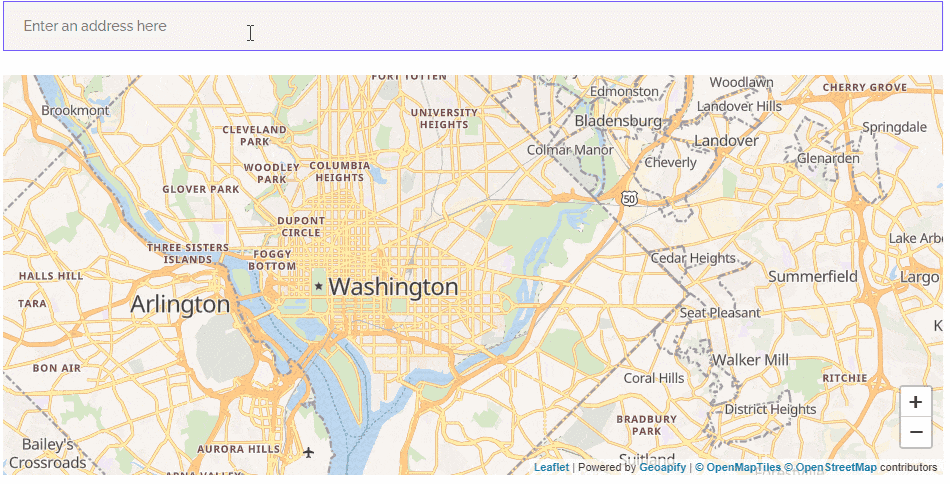
Please remember that the address autocomplete field needs to be styled and placed according to your website's requirements. Find class names and styling examples below in the code samples.
Adding a Marker
The final step is to add a marker to our map. This will help visitors identify the location on the map.
To add the marker in your map, add the following code to the "Custom HTML" block you created in Step 3 of the previous section.
<script>
...
// generate an marker icon with https://apidocs.geoapify.com/playground/icon
const markerIcon = L.icon({
iconUrl: `https://api.geoapify.com/v1/icon/?type=awesome&color=%232ea2ff&size=large&scaleFactor=2&apiKey=${myapiKey}`,
iconSize: [38, 56], // size of the icon
iconAnchor: [19, 51], // point of the icon which will correspond to marker's location
popupAnchor: [0, -60] // point from which the popup should open relative to the iconAnchor
});
let marker;
autocompleteInput.on('select', (location) => {
// Add marker with the selected location
if (marker) {
marker.remove();
}
if (location) {
marker = L.marker([location.properties.lat, location.properties.lon], {
icon: markerIcon
}).addTo(map);
map.panTo([location.properties.lat, location.properties.lon]);
}
});
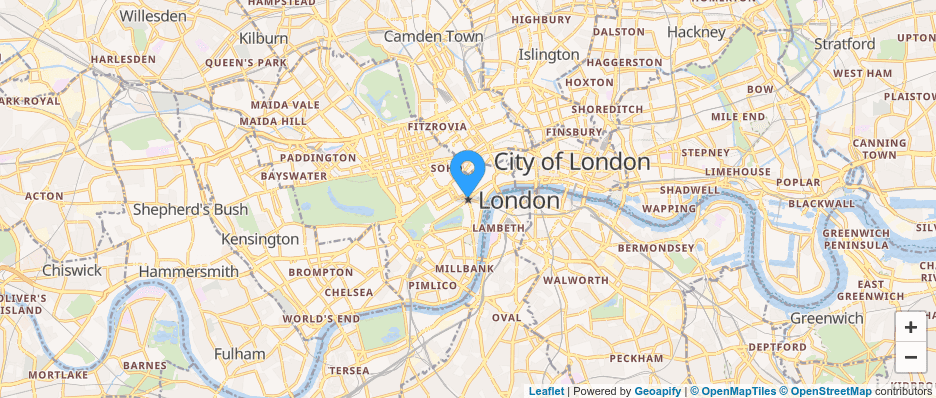
</script>That's it! You have successfully added a map with an address autocomplete field to a WordPress website:
Adding Custom Styling
Many websites have their own theme or CSS styles that may conflict with the styling of the address autocomplete field. There are a few ways to style the Geocoder Autocomplete address field to prevent conflicts with the website's themes or CSS styles. The easiest way is to use the custom styling options that are provided.
To do this, simply add the following classes to the HTML elements that you want to style:
.geoapify-autocomplete-input: Used to add styling in the input element.geoapify-autocomplete-items: Used to add styling in the dropdown list.geoapify-autocomplete-items .active: Used to add styling in the selected element in the dropdown list.geoapify-autocomplete-item: Used to add styling in the dropdown list item.geoapify-autocomplete-item.icon: Used to add styling in the dropdown list item icon.geoapify-autocomplete-item.text: Used to add styling in the dropdown list item text.geoapify-close-button: Used to add styling in the clear button
With these classes in place, you can now add your own CSS styling to customize the look of the address field.
Now, create a new "Custom HTML" block and add the following content to add styling in your address autocomplete field.
<style>

.map-container {
  position: relative;
}

.autocomplete-panel {
  position: absolute;
  top: 10px;
  left: 10px;
  width: 350px;
  z-index: 1000;
}

.autocomplete-container {
  position: relative;
}

html,
body,
#map {
  width:'400px' ;
  height: '400px';
  margin: 0;
}

.autocomplete-container input.geoapify-autocomplete-input {
  margin-bottom:0;
  height:36px;
}

</style>
Conclusion
In this article, we showed you how to add a Leaflet map with an autocomplete field to your WordPress website. You can use this same method to add maps to any type of CMS website - Joomla, HubSpot, WooCommerce, and others.
Want to add places and POIs to the same input? See Address Autocomplete with Built-In Places Support.